You do not need an account to start, and you do not need to decide anything permanent. Everything below can be changed later, including the name, the content, the colours and what the page is for.
1. Pick a starting point
- 1
Go to the sign-up page
Open getnearfield.com/signup. The first question is what kind of space you are building for: a museum or attraction, a hotel or rental, a restaurant, a shop, a campus, a community event, or something else. This only decides which starting points you are shown.
- 2
Choose a template, or start blank
You get a filtered set of templates plus Blank Experience. A template is a skeleton of blocks in a sensible order, not a finished page: you will replace the words either way, so pick the one whose shape matches what you are making. A card marked Uses Starter features or Uses Growth features shows off a block or two from that plan. You can build with all of them on a free account, and they reach visitors once your page is live and the 14-day trial starts.
- 3
Land in the builder
NearField creates the Experience and opens it. No account has been asked for yet: you are working in a temporary session, and a banner reading Your work isn't saved yet stays visible until you attach an email.
2. Let the AI draft the first version
The builder opens on Quick Start, which takes either a web address or a written description. Give it your existing website and it reads the page, pulls your colours, your logo and your photographs, and streams blocks into the Experience one at a time. Give it a description instead and it writes from that.
AI-written blocks arrive with a small AI badge and a pale green highlight, meaning “nobody has looked at this yet”. Open each one, fix what is wrong, and keep it. With two or more drafts waiting, a Keep all button appears in the top bar.
3. Edit, add and arrange blocks
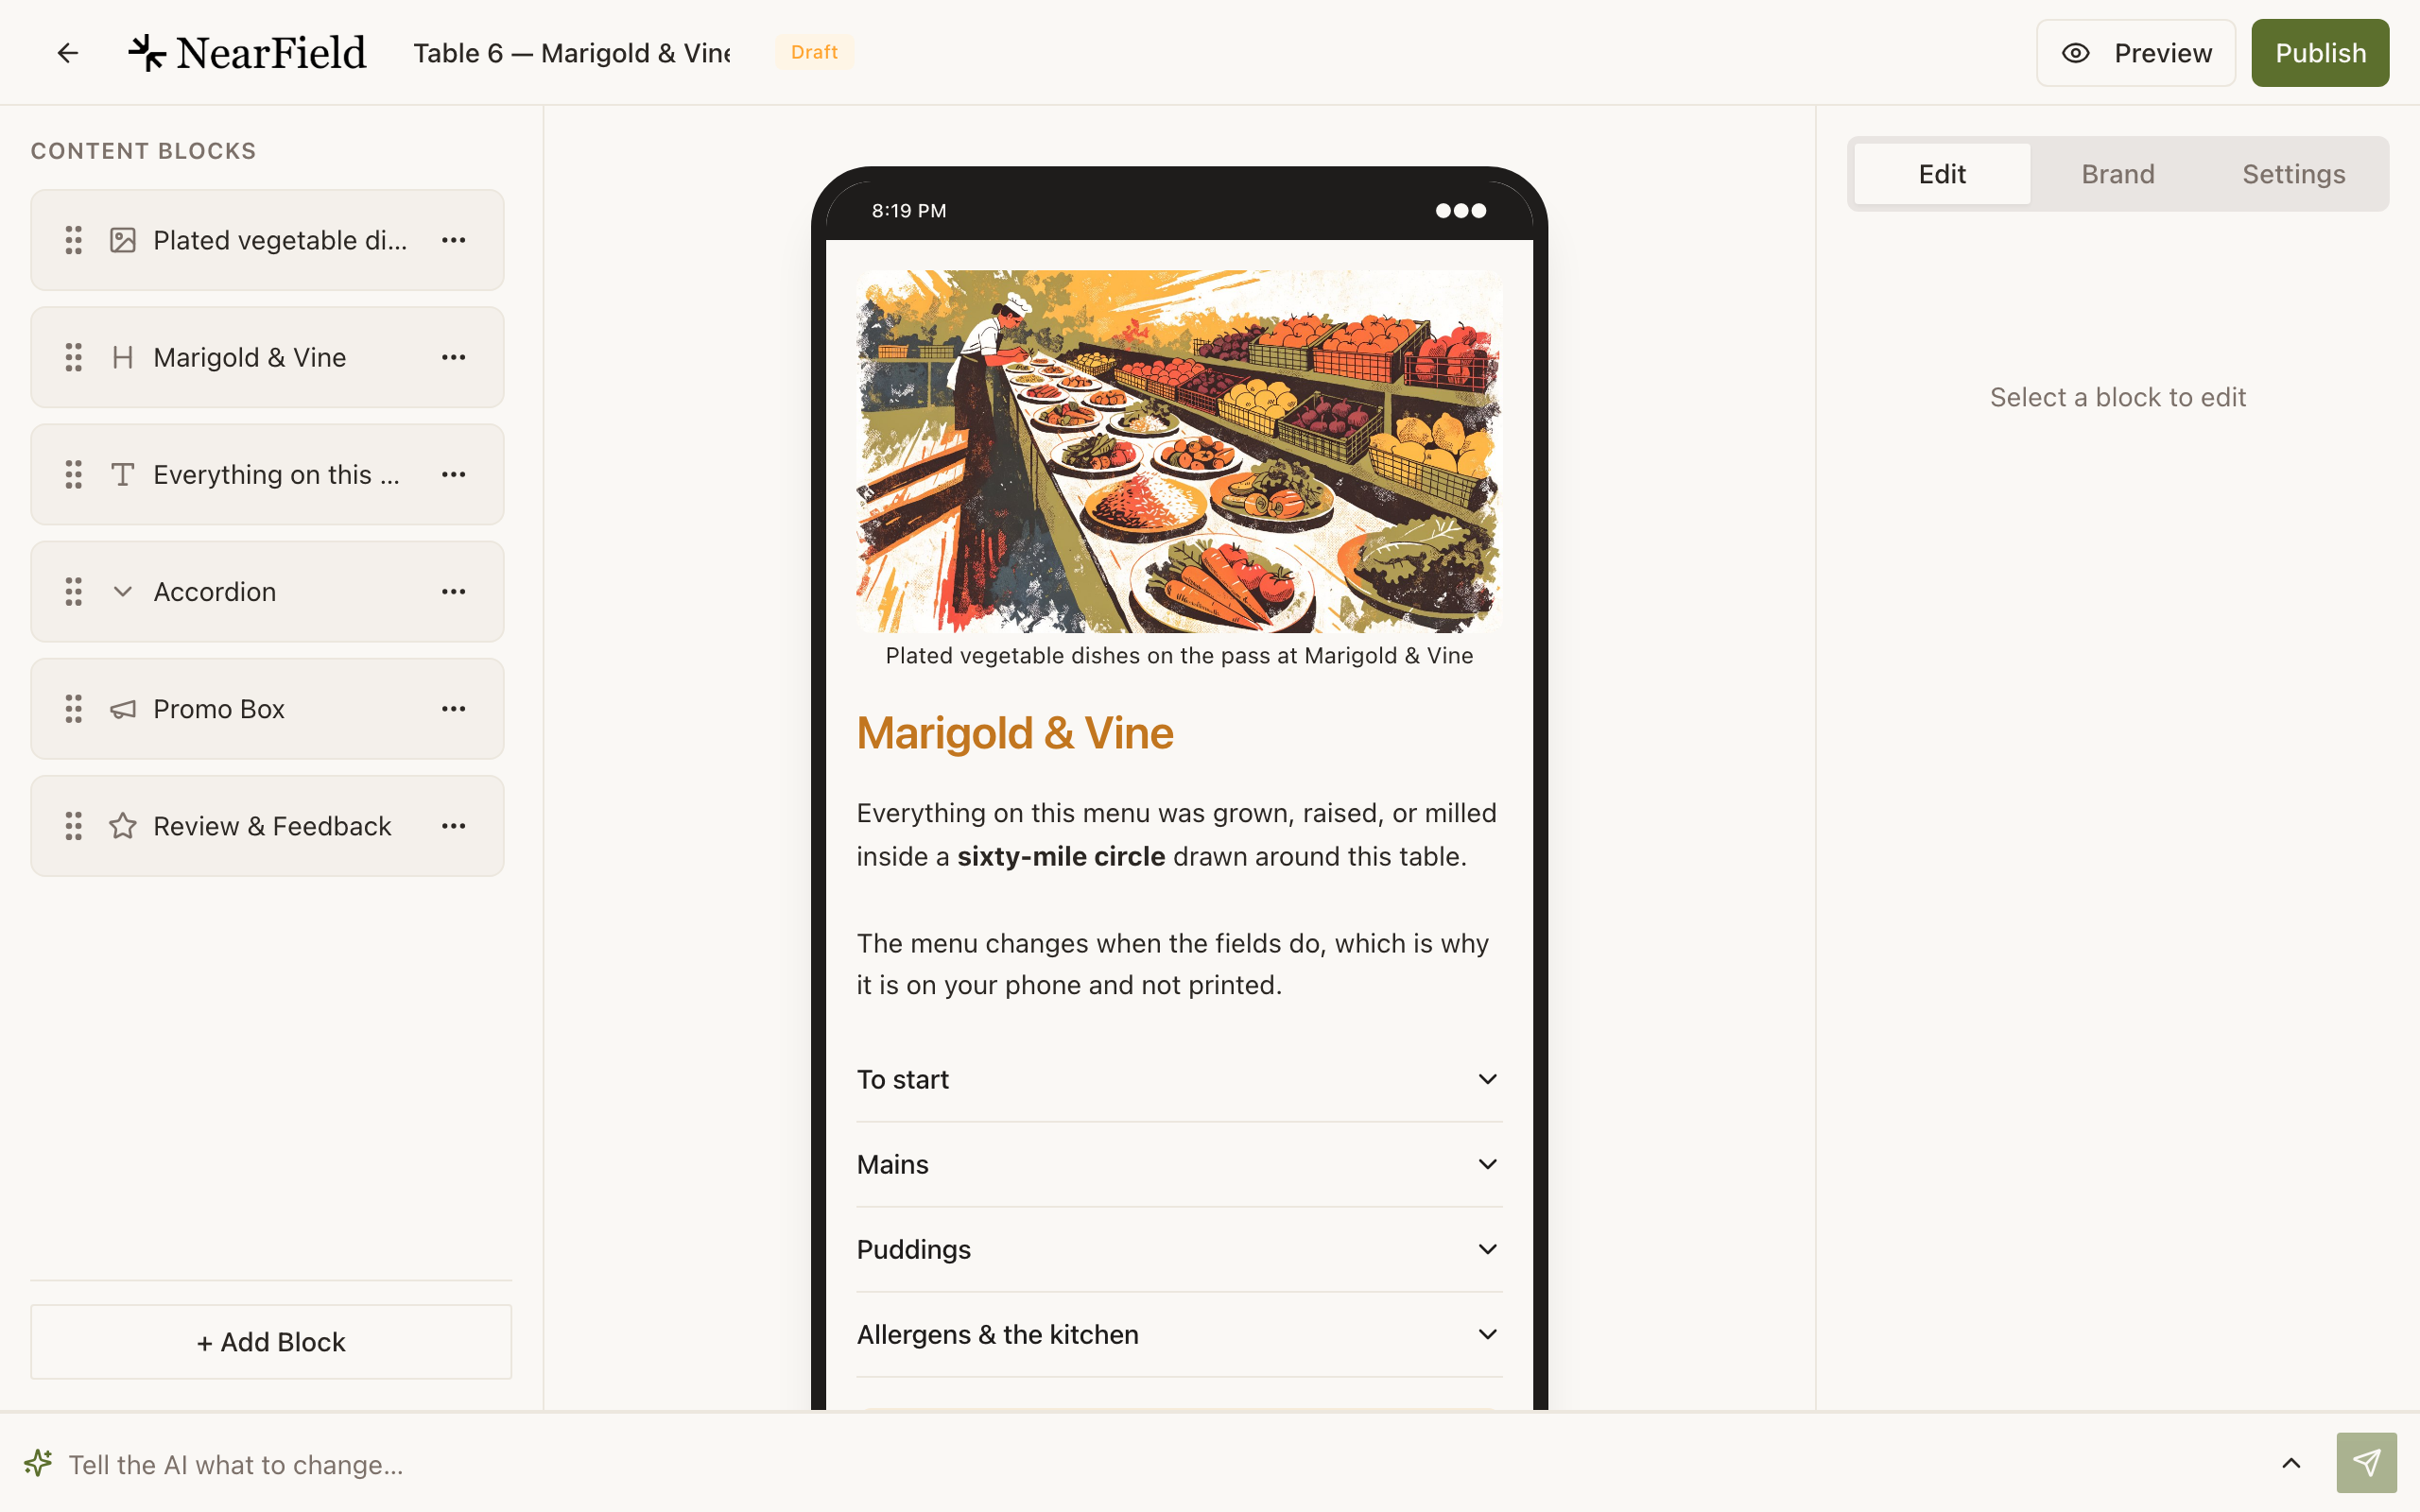
On a desktop the builder is three columns: your blocks on the left, a live phone preview in the middle, and the editor for whatever is selected on the right. On a phone the preview fills the screen and two floating buttons open Content blocks and Ask AI.
A block in the list, and its menu
Feeding times
Hours
The handle on the left drags the block up and down the page. The three dots on the right open the menu.
Edit
Opens this block's fields: its words, its images, its settings.
Duplicate
Copies the block and its content in directly underneath.
Move up
One place up the page. Greyed out on the first block.
Move down
One place down. Greyed out on the last.
Delete
Removes the block. The rest of the Experience is untouched.
- 1
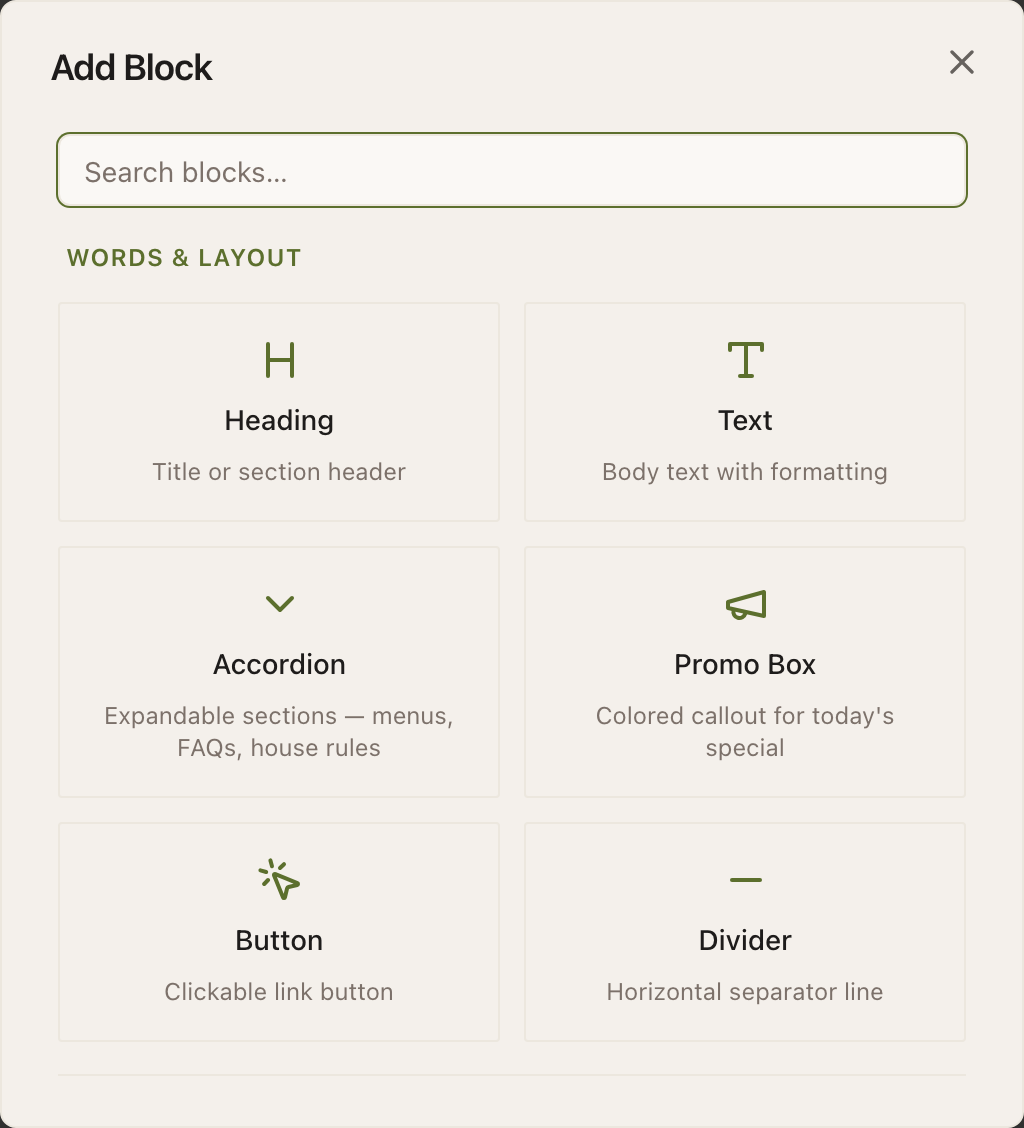
Press + Add Block
The picker is searchable and grouped by job: words and layout, photos and media, visit info and one-tap help, questions and answers, payments and giving.
- 2
Fill in the block
Each block has its own short set of fields. The middle column updates as you type; there is no save button, because every edit is saved as you make it.
- 3
Put it in the right order
Drag the handle at the left of a block, or use Move up and Move down in its overflow menu. Order in the list is order on the page.
- 4
Cut what you do not need
The same menu has Duplicate and Delete. A template you started from will usually have two or three blocks you will never fill in: remove them.
Full detail on all of this is in adding, arranging and removing blocks, and every block type is documented in every block at a glance.
4. Make it look like you
The Brand tab in the right rail carries the colours. By default an Experience uses your account's logo and palette, which is usually what you want when you are building several. Turn Use brand defaults off and this one Experience gets its own primary colour, secondary colour and page background. See theming an Experience.
5. Look at it on a real phone
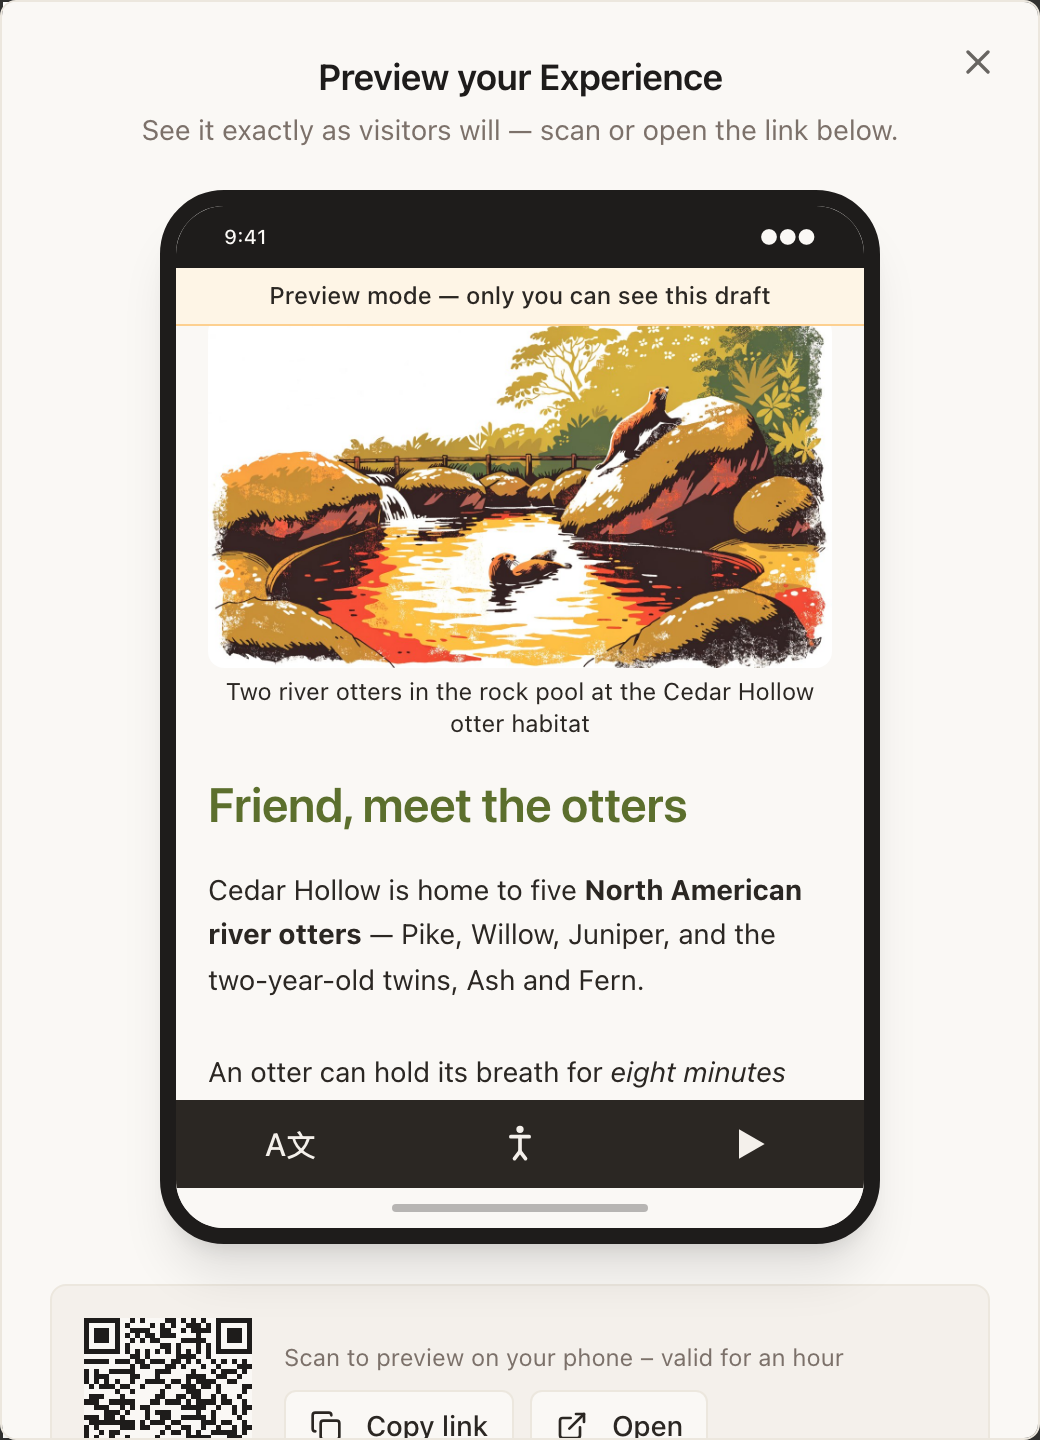
The middle column is the same renderer a visitor gets, but a phone in your hand is not the same as a phone-shaped rectangle on a monitor. Press Preview in the top bar and scan the QR code it shows: that opens the draft on your own phone through a link that lasts an hour.
6. Publish

Publish opens a confirmation panel headed “Ready to go live?”, with a miniature preview, the editable name, the public URL and three readiness checks: a heading, some content, and a logo on your brand. None of them block you. On a free account, if going live starts your 14-day trial, the panel says so above the button: Publishing this page starts your 14-day free trial. No card needed now. Press Go Live.
Draft, published, and back again
Draft
Who can see it
Only you, signed in
Address
/preview/{hash}
Every change is saved as you make it. Nothing here is reachable by a visitor, and a Marker pointed at a draft has nothing to open.
Published
Who can see it
Anyone with the link
Address
/view/{hash}
The public page. Edits you make afterwards go live the next time someone opens it. There is no second publish step for changes.
Unpublished again
Who can see it
Nobody
Address
None
The content stays exactly as you left it. Visitors get a short 'not available' page, and any Marker pointing here lands on the same.
The Experience now has a public link, and edits you make from here on appear the next time somebody opens it. There is no second publish step for changes.
7. Then make it physical
Publishing hands you a hub with the link, a QR code and a step called Bring it into the real world: connect a Marker you already have by typing its PIN, or design and order some. That is the subject of getting your first Marker on a wall.
Example
Marigold & Vine
Marigold & Vine started from the Restaurant Table Tent template, gave Quick Start their website, and got a heading, a photo gallery and opening hours in about forty seconds. They deleted the map block (everyone at the table is already there), added today's specials as a text block, added a five-star rating question at the bottom, set the primary colour to their green, previewed it on a phone at table six, and published. Elapsed time: eleven minutes.
Does the Experience name show up anywhere public?
The name is for you: it is what you see in your dashboard and in the Markers list. Visitors see the blocks on the page, not the name, unless you have also written it into a heading block.
I started building before signing up. Is my work safe?
It is stored, but it belongs to one browser session until you attach an email or a Google or Apple account. Clearing site data or switching devices before then loses it.
Can I change the template after I have picked one?
There is nothing to change back to: a template only decides which blocks you start with. Add, delete and reorder freely; nothing is locked to the template you chose.
How long does it take before somebody can see it?
The moment you press Go Live. There is no review, no propagation delay and no build step.
Ready to do it for real?
Start building